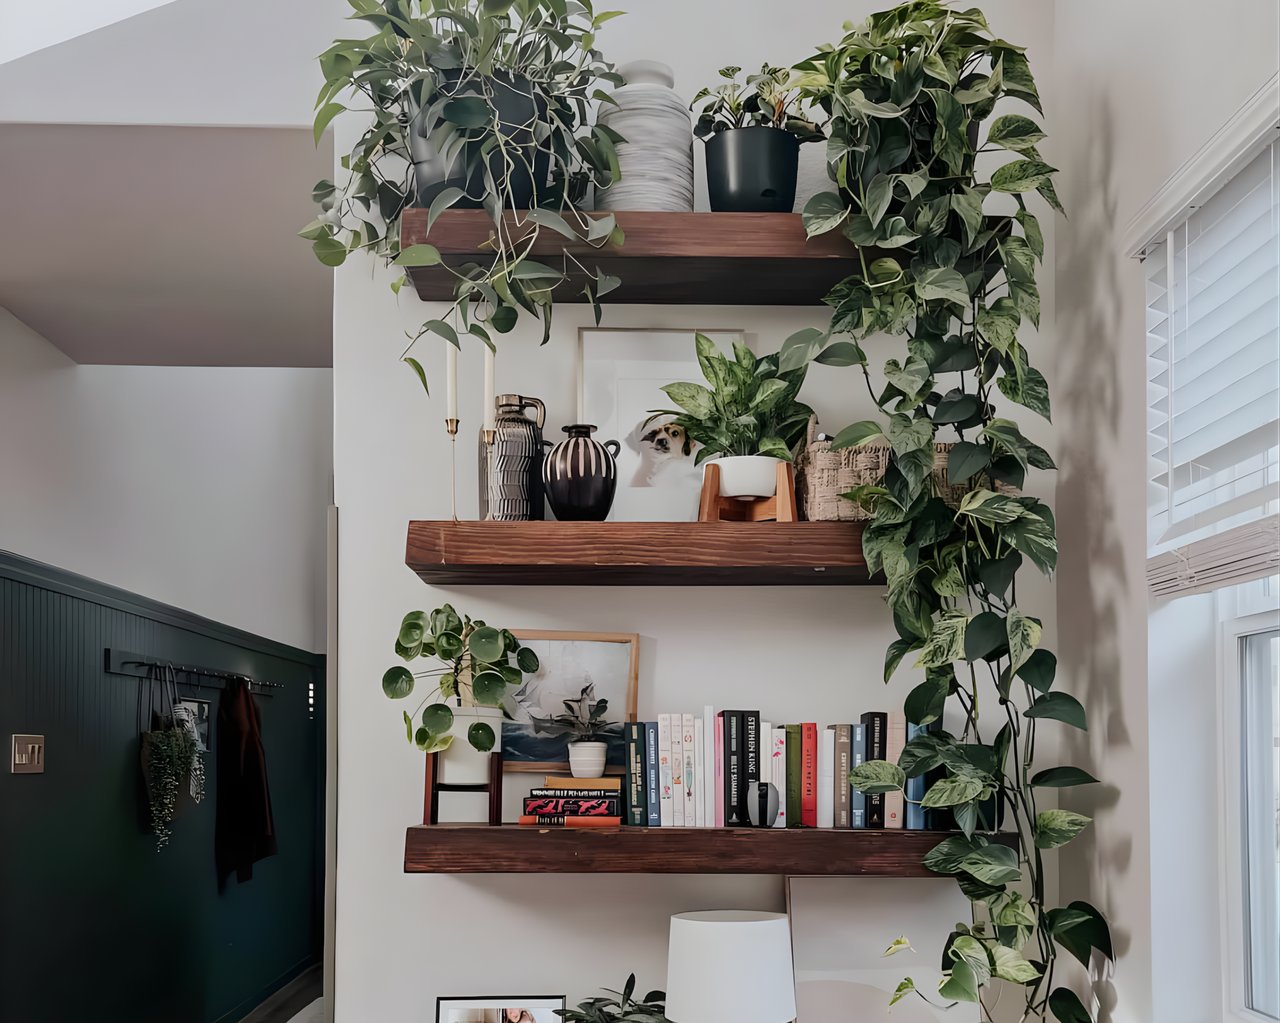
Turn an empty wall into a statement piece with simple, functional shelves you can build yourself. Whether you’re displaying books, plants, or collectibles, this project adds personality and purpose to any room.
Step 1: Choose a Location
Pick a wall that needs a little love — think entryway, kitchen, or workspace. Make sure it can handle the shelves’ weight once installed.
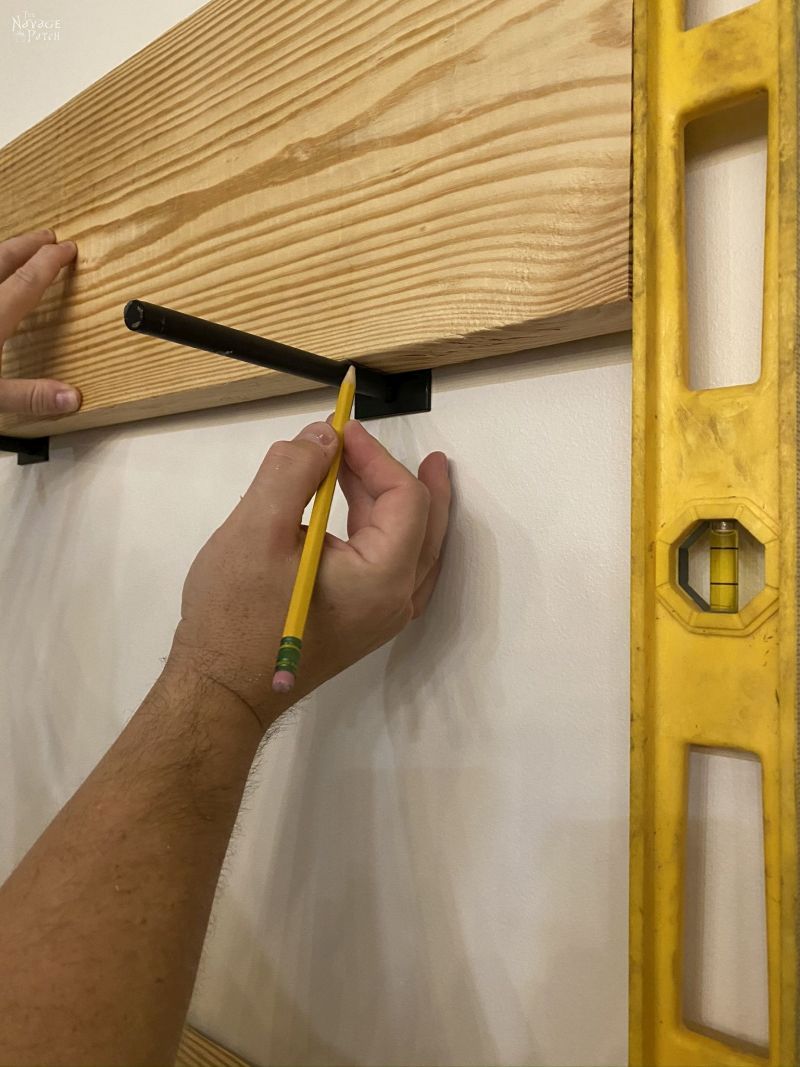
Step 2: Measure and Mark
Grab a tape measure and level to mark where each shelf and bracket will go. Even spacing and straight lines make all the difference.
Step 3: Prepare the Shelves
Sand and smooth the wood, then stain or paint it to match your space. Let it dry completely before installation.
Step 4: Install the Brackets
Drill pilot holes, secure your brackets, and double-check alignment before moving on. Sturdy brackets mean sturdy shelves.
Step 5: Attach the Shelves
Place your shelves on the brackets, secure them, and step back — your wall just got a major upgrade.
Perfectly Framed Finish
Your new DIY custom shelves combine clean design with real functionality — a simple, satisfying project that instantly elevates your space.
Compass is a real estate broker licensed by the State of California operating under multiple entities. License Numbers 01991628, 01527235, 01527365. All material is intended for informational purposes only and is compiled from sources deemed reliable but is subject to errors, omissions, changes in price, condition, sale, or withdrawal without notice. No statement is made as to the accuracy of any description or measurements (including square footage). This is not intended to solicit property already listed. No financial or legal advice provided. Equal Housing Opportunity. Photos may be virtually staged or digitally enhanced and may not reflect actual property conditions.
Etiam non quam lacus suspendisse faucibus interdum. Orci ac auctor augue mauris augue neque. Bibendum at varius vel pharetra. Viverra orci sagittis eu volutpat. Platea dictumst vestibulum rhoncus est pellentesque elit ullamcorper.